News
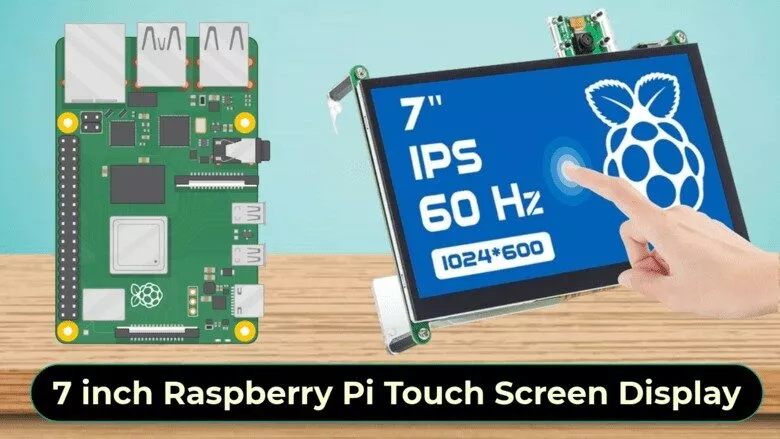
How to connect and setup a 7" Pi Touchscreen LCD Display?
How to connect and setup a 7" Pi touchscreen LCD Display?
Content Menu
>> Preparing Your Raspberry Pi
● Key Features of the 7-Inch touchscreen Display
>> Viewing Angle and Display Quality
● Troubleshooting Common Issues
● Configuring Display Settings
● Applications of the 7-Inch touchscreen
● Frequently Asked Questions (FAQ)
>> 1. What is the resolution of the 7-inch Raspberry Pi touchscreen display?
>> 2. Can I use the 7-inch touchscreen display with any Raspberry Pi model?
>> 3. How do I power the 7-inch touchscreen display?
>> 4. What type of touch technology does the 7-inch display use?
>> 5. How do I troubleshoot issues with the display not showing properly?
Introduction
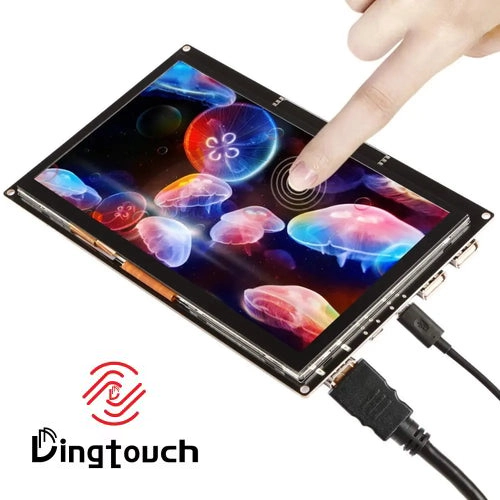
Connecting and setting up a 7-inch Raspberry Pi touchscreen LCD display is a rewarding project that can enhance your DIY electronics skills. This comprehensive guide will walk you through the necessary steps to successfully integrate a 7-inch touchscreen with your Raspberry Pi, ensuring you can utilize it for various applications, from media centers to interactive kiosks.
Preparing Your Raspberry Pi
Before assembling the touchscreen, it's crucial to ensure your Raspberry Pi has the latest version of Raspberry Pi OS and that all software is up to date. Connect your Pi to a monitor, plug in your keyboard and mouse, and boot it into Raspberry Pi OS. Open a terminal window and update your system to ensure all software components are current and compatible with your hardware. This step minimizes potential issues during setup and operation.
After updating, safely shut down your Pi, unplug everything, and set it aside. This preparation ensures that your Raspberry Pi is ready for the touchscreen integration.
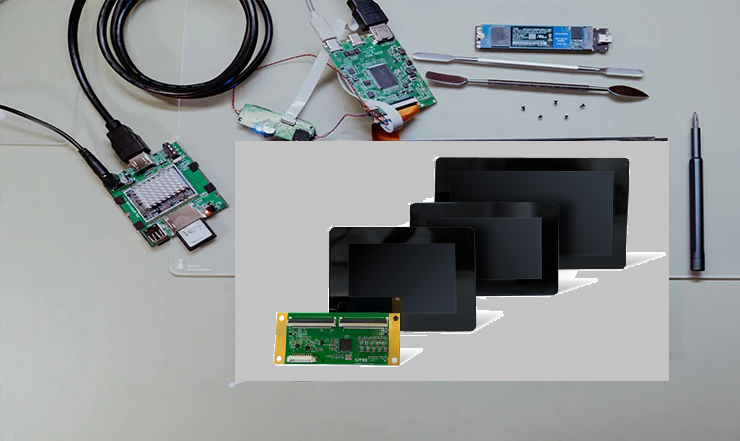
Building the Touch Screen
The 7-inch touchscreen display typically comes with a controller board, standoffs, and various cables. Start by connecting the large ribbon cable from the screen to the connector on the underside of the controller board. Carefully undo the clamp before inserting the cable, then press the clamp in to secure the ribbon in place. Next, turn the controller board over and connect the small ribbon cable from the screen to the board using the same method.
Using the provided standoffs, secure the controller board to the screen. Connect one end of the white ribbon cable to the controller board, ensuring the blue tab faces down towards the board. The other end of the white ribbon cable should be connected to the Raspberry Pi's display port, with the blue tab facing up.
Only the red and black jumper wires are required for power. Connect the red wire to the 5V pin and the black wire to the GND pin on the Raspberry Pi. Mount the Raspberry Pi on top of the standoffs and connect the jumper wires to the corresponding pins on the controller board.
Finally, plug an official Raspberry Pi power supply into the controller board to power both the Pi and the display. Alternatively, you can use a separate micro USB power supply for the display if needed.
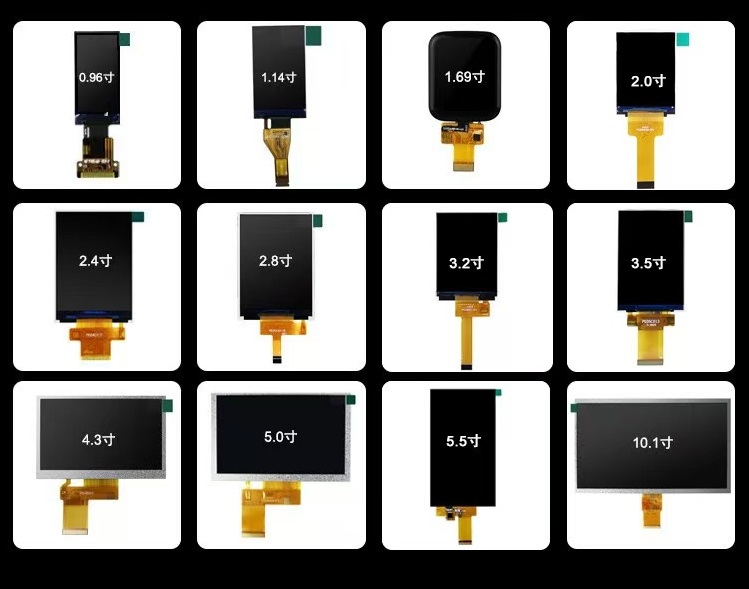
Key Features of the 7-Inch touchscreen Display
The 7-inch touchscreen display is a versatile and powerful tool for Raspberry Pi projects. It features a resolution of 800x480 pixels, providing clear visuals for applications. The capacitive touch technology supports multi-touch capabilities, making it ideal for interactive projects. The display is compatible with most Raspberry Pi models, except the Raspberry Pi Zero and Zero 2 W, which lack a DSI connector.
Power Requirements
The display requires a power supply of 5V, typically consuming around 200mA at maximum brightness. You can power it using the Raspberry Pi's GPIO pins or a separate micro USB power supply. The flexibility in power options allows you to choose the most convenient setup for your project.
Viewing Angle and Display Quality
The display offers a wide viewing angle, ensuring that the content remains clear from various positions. This feature is particularly useful for applications where the display will be viewed by multiple people simultaneously. The industrial-quality build and 24-bit color support enhance the overall visual experience, making it suitable for both personal and professional projects.
Troubleshooting Common Issues
When setting up your 7-inch touchscreen, you might encounter several issues. Here are some common problems and their solutions:
1. Display Not Showing Properly: Ensure that the Flat Flexible Cable (FFC) is fully inserted and correctly positioned. The silver or gold contacts should face away from the display when connected to the `RPI-DISPLAY` port and inward towards the Raspberry Pi when connected to the `DISPLAY` port.
2. Touch Functionality Not Working: Check if the ribbon cables are securely connected to both the display and the controller board. Try reseating the cables to resolve any connectivity issues.
3. Flickering or White Patterns on the Screen: This could be due to loose connections or power supply issues. Ensure that all cables are securely connected and try using a different power supply if necessary.
4. Incorrect Touch Behavior: If the touch function is dragging icons instead of selecting them, check if the touch overlay is correctly configured in your Raspberry Pi OS settings.
5. Compatibility Issues: Ensure that your Raspberry Pi model supports the display. Most models are compatible, but the Raspberry Pi Zero and Zero 2 W lack the necessary DSI connector.
Configuring Display Settings
To configure your display settings, you may need to adjust the `config.txt` file. For example, to rotate the display, you can add a specific configuration line to the file. This is useful if your display appears upside down when mounted. Additionally, you can adjust the backlight brightness using PWM controls available through the I2C interface, which can help optimize power consumption and viewing comfort.
Applications of the 7-Inch touchscreen
The 7-inch touchscreen is versatile and can be used in a variety of projects:
- Media Centers: Create a media center for streaming videos and music with a user-friendly interface. You can install media player software like Kodi or Plex, which support touch controls, making navigation easy without a keyboard or mouse.
- Interactive Kiosks: Design interactive kiosks for public spaces, providing information or services to users. The touchscreen interface allows users to interact with the system intuitively, making it ideal for applications like digital signage or public information displays.
- Digital Photo Frames: Build a digital photo frame that can display photos and videos with touch controls. You can create a slideshow of your favorite images or connect it to the internet to fetch new photos automatically.
- Smart Mirrors: Create a smart mirror that displays useful information like weather forecasts, news, or calendar events. This project combines a two-way mirror with the touchscreen display, providing a futuristic look and feel.
- Tablets and Infotainment Systems: Turn your Raspberry Pi into a tablet or infotainment system by integrating the touchscreen with a rechargeable battery pack and a suitable case. This setup allows for portable use, making it perfect for educational or entertainment purposes.
Enhancing User Experience
To further improve user experience on your 7-inch touchscreen, consider implementing these enhancements:
- Custom User Interfaces: Design a custom user interface tailored specifically for your application using tools like Qt or GTK. This can significantly enhance usability by providing visually appealing and easy-to-navigate interfaces.
- Touch Gestures: Integrate touch gestures like swiping, pinching, or tapping to make interactions more intuitive. For instance, swiping left or right could navigate through images in a photo gallery app or switch between different screens in a kiosk application.
- Audio Output: Add audio output capabilities through speakers connected to your Raspberry Pi. This addition will create a more immersive experience for users, especially in media playback or interactive applications.
Conclusion
Setting up a 7-inch Raspberry Pi touchscreen LCD display is a straightforward process that requires careful attention to detail. By following the steps outlined in this guide, you can successfully integrate a touchscreen into your Raspberry Pi projects, unlocking a wide range of creative possibilities. Whether you're building a media center, an interactive kiosk, or a digital photo frame, the 7-inch touchscreen display is an excellent choice.
Frequently Asked Questions (FAQ)
1. What is the resolution of the 7-inch Raspberry Pi touchscreen display?
The resolution of the 7-inch Raspberry Pi touchscreen display is typically 800x480 pixels.
2. Can I use the 7-inch touchscreen display with any Raspberry Pi model?
The display is compatible with most Raspberry Pi models, except the Raspberry Pi Zero and Zero 2 W, which lack a DSI connector.
3. How do I power the 7-inch touchscreen display?
You can power the display using the Raspberry Pi's GPIO pins or a separate micro USB power supply.
4. What type of touch technology does the 7-inch display use?
The display uses capacitive touch technology, supporting multi-touch capabilities.
5. How do I troubleshoot issues with the display not showing properly?
Ensure that the Flat Flexible Cable is fully inserted and correctly positioned. Check for loose connections and try reseating the cables.
Choose DINGTouch, touch the future
DINGTouch is committed to providing customers with high-quality customized touch display solutions to help the widespread application of Deep Seek technology. Whether it is high-end AI equipment, medical monitoring systems, or intelligent industrial control, DINGTouch can provide the highest quality touch display customization services.
Please contact us at Sales@szdingtouch.com for more product information and technical support services.
DINGTouch - Touch the future, precise every moment!

DINGTouch :Committed to continuous innovation and improvement of product quality to meet customers' high requirements and expectations.
DINGTouch is a manufacturer that provides high quality touch screen panels. Focus on the design, manufacturing and sales of touch screen panels, and are committed to providing customized solutions that satisfy customers.
DINGTouch: In the process of customizing touch screen panels, we focus on close cooperation and communication with customers. Understanding customers' needs and providing customized solutions will meet customers' individual needs. The company's products are favored by customers for their high quality and reliability, and provide them with the best Touchscreen panel solutions.
At DINGTOUCH, we are the world's leading touchscreen manufacturer, helping businesses around the world take advantage of this exciting technology. For more information, please visit the home page now.
Find the DINGTouch technical team to achieve the success of your company's new project.

DINGTouch is a company specializing in the R&D and production of touch screen technology, headquartered in Shenzhen, China. As a professional touch screen supplier, DINGTouch is committed to providing high-quality, stable and reliable touch screen products to meet the diverse needs of customers. We continue to carry out technological innovation and product optimization to ensure that its touch screen products have good sensitivity, accuracy and durability.
In addition to the products themselves, we also focus on cooperation and communication with customers, and are committed to providing customized solutions and excellent after-sales services. Through continuous efforts to improve product quality and customer satisfaction, we have established a good reputation in the touchscreen industry and won widespread market recognition.
In addition to the products themselves, we also focus on cooperation and communication with customers, and are committed to providing customized solutions and excellent after-sales services. Through continuous efforts to improve product quality and customer satisfaction, we have established a good reputation in the touchscreen industry and won widespread market recognition.

What DINGTOUCH can do:
• PCAP maximum size 65”
• Multi-touch (Touch screen can be customized to your needs.)
• Optical bonding service/air bonding
• LCD interface: HDMI/RGB/MIPI/LVDS/EDP, etc.
• PCAP interface: IIC/USB interface
• CTP can customize the cover glass surface treatment process AG (anti-glare), AR (anti-reflection), AF (anti-fingerprint), waterproof, and glove touch
• Supports 0.55 mm-12 mm coverslip touch.
• Support operating temperature: -40℃-90℃.

Dingtouch Industrial Capacitive Touch Screen Manufacturer
In conclusion, Dingtouch as a professional touch screen manufacturer with more than 10 years touch screen experience.We have many capacitive touch screen. Such as5 inch touch screen,7 inch touch screen,10.1inch touch screen,15 inch touch screen,15.6 inch touch screen,17 inch touch screen,18.5 inch touch screen,19 inch touch screen,21.5 inch touch screen,32 inch touch screen, However, we also welcome to customize your own touch screen . Contact our team today to learn what capacitive touch screen are best for our retail business needs.
Contact us NOW! sales@szdingtouch.com
CATEGORIES
CONTACT US
Contact: Dingtouch
Phone: +8615815536116
Tel: +8615815536116
Email: sales@szdingtouch.com
Add: Building A, Bailu Plaza, No. 48, Gonghe Industrial Road, Gongle Community, Xixiang Street, Baoan District, Shenzhen,China. 518126
 Dingtouch