News
What Component Is in Charge of Powering An Lcd Screen?
What Component Is in Charge of Powering An Lcd Screen?
Content Menu
● Introduction to LCD Screen Powering
● Importance of Efficient Power Delivery
● Key Components of an LCD Power System
>> 2. High-Voltage Board (Inverter)
>> 3. Driver Board (Main Board)
>> 4. LCD Panel
>> 5. Keyboard and Control Board
● Power Distribution and Management
● Common Issues and Troubleshooting
● DIY LCD Repair Guide: Tools and Techniques for Home Fixes
>> 1. What is the role of the power supply in an LCD screen?
>> 2. How does the high-voltage board (inverter) work?
>> 3. What are the main functions of the driver board?
>> 4. What are the common symptoms of a faulty power supply?
>> 5. Can I repair an LCD screen at home?
Introduction to LCD Screen Powering
DINGTouch:Liquid Crystal Display (LCD) have become ubiquitous in modern technology, from television screens and computer monitors to handheld devices like smartphones and tablets. Powering an LCD screen involves several key components working in concert to deliver the necessary voltages and currents for proper operation[1]. Understanding these components and their roles is crucial for anyone involved in electronics repair, design, or even just general interest in how these displays function.
Evolution of LCD Technology
LCD technology has undergone significant evolution since its inception. Early LCD were simple, low-resolution displays, but advancements in materials, manufacturing processes, and driving techniques have led to high-resolution, energy-efficient displays with excellent color reproduction[3]. These advancements have directly impacted the power supply requirements and the components used to deliver that power.
Importance of Efficient Power Delivery
Efficient power delivery is paramount in LCD screens for several reasons:
- Energy Conservation: Lower power consumption translates to longer battery life in portable devices and reduced energy bills for larger displays.
- Thermal Management: Inefficient power supplies generate heat, which can damage the LCD panel and other components.
- Performance: Stable and clean power is essential for consistent image quality and reliable operation.
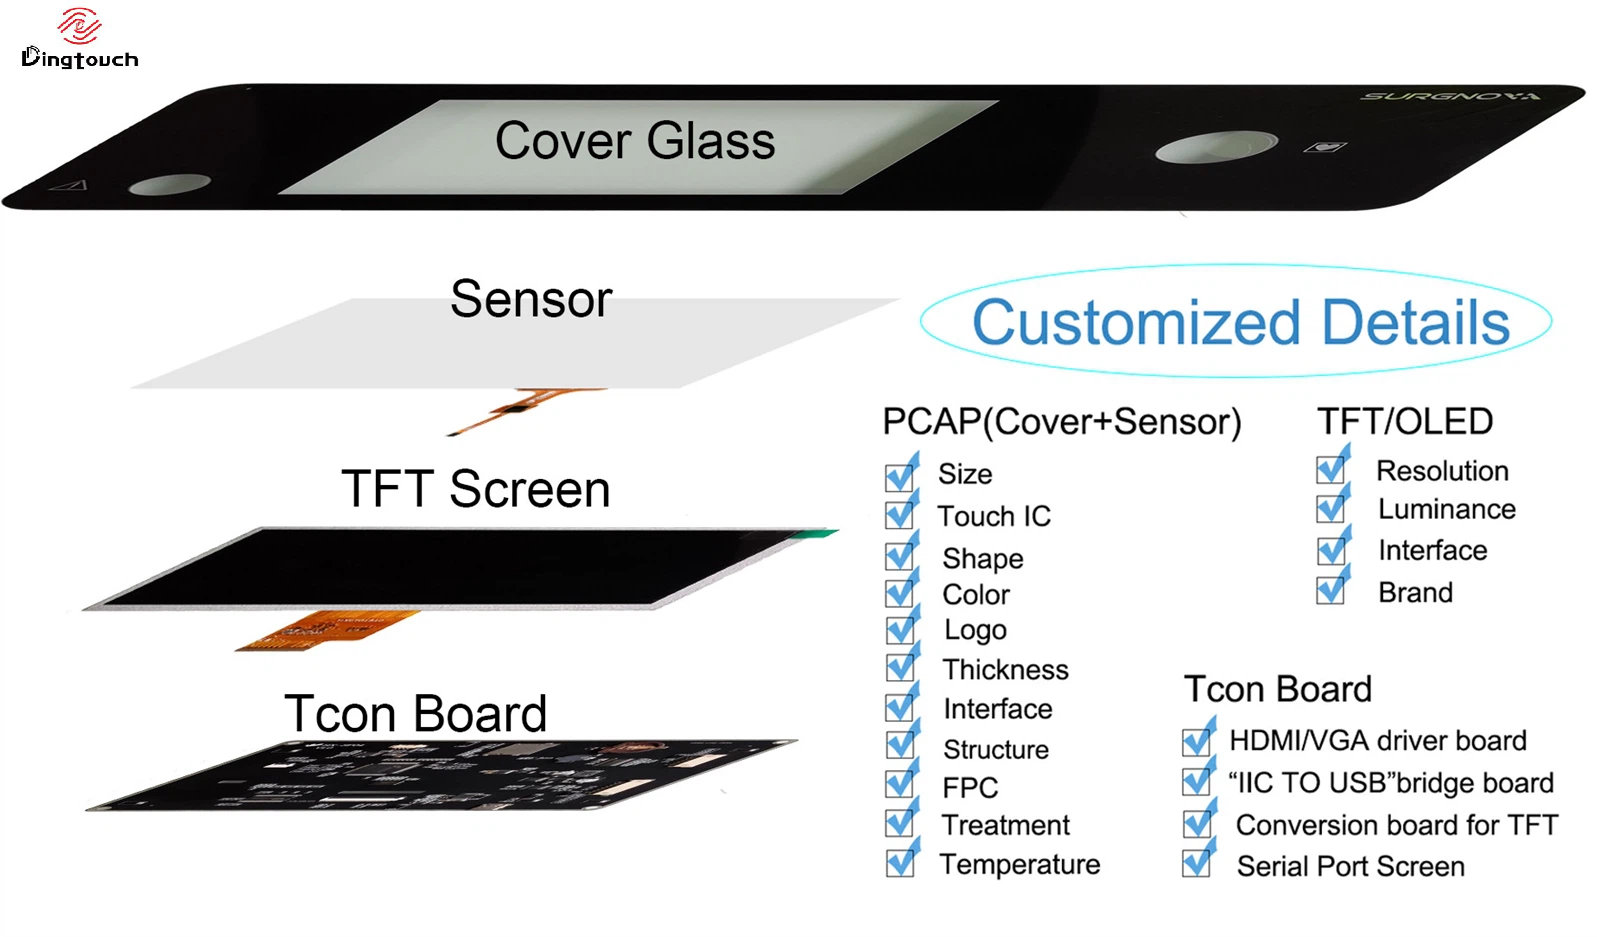
Key Components of an LCD Power System
The power system of an LCD screen typically comprises several distinct components:
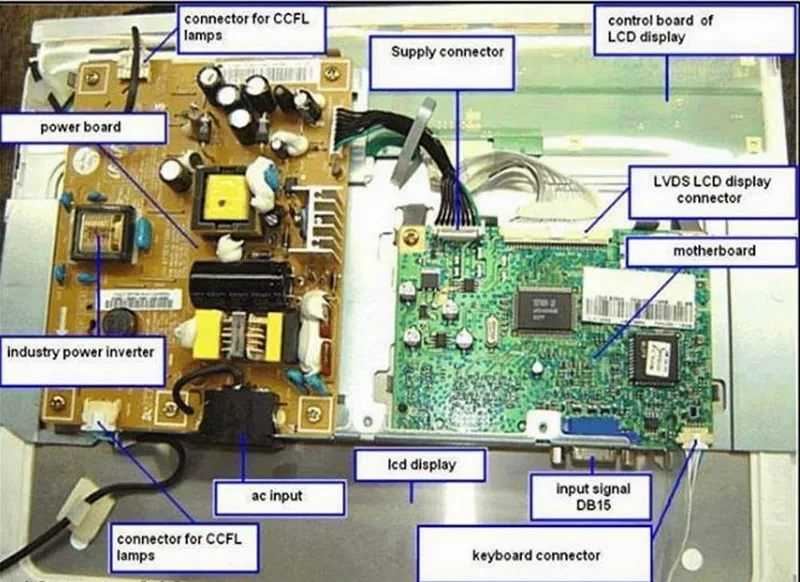
1. Power Supply Unit (PSU)
The primary function of the Power Supply Unit (PSU) is to convert the incoming AC voltage from a wall outlet into the DC voltages required by the LCD screen. This conversion typically occurs in two stages:
- Switching Power Supply (AC/DC Converter): This stage converts the AC voltage (e.g., 110V or 220V) into a lower DC voltage, typically 12V, 14V, 18V, 24V, or 28V, depending on the specific LCD model.
- DC/DC Converter: This stage further converts the DC voltage from the switching power supply into the various voltage levels needed by different parts of the LCD, such as 5V, 3.3V, 2.5V, etc. These voltages power the driver board and the LCD panel itself.
2. High-Voltage Board (Inverter)
The High-Voltage Board, also known as an inverter circuit, is responsible for generating the high-frequency, high-voltage AC required to power the backlight of the LCD panel[1][4].
- Function: It converts the low-voltage DC from the power supply into a high-voltage AC (often above 600V) needed to illuminate the backlight[1][4].
- Installation: High-voltage boards can be implemented as a dedicated circuit board or integrated with the switching power supply circuit[1].
3. Driver Board (Main Board)
The Driver Board, often referred to as the main board, is the central control unit of the LCD[4]. It receives signals from the input source (e.g., HDMI, VGA) and processes them to display the image on the LCD panel. Key components of the driver board include:
- Input Interface Circuit: This circuit receives the input signal (e.g., VGA, HDMI) from the source device.
- A/D Conversion Circuit: Converts analog signals to digital signals for processing.
- Clock Generator: Provides the timing signals necessary for the various circuits to operate synchronously.
- Scaler Circuit: Scales the input image to match the resolution of the LCD panel.
- Microcontroller Circuit (MCU): Controls the overall operation of the driver board.
- Output Interface Circuit: Sends the processed video signal to the LCD panel.
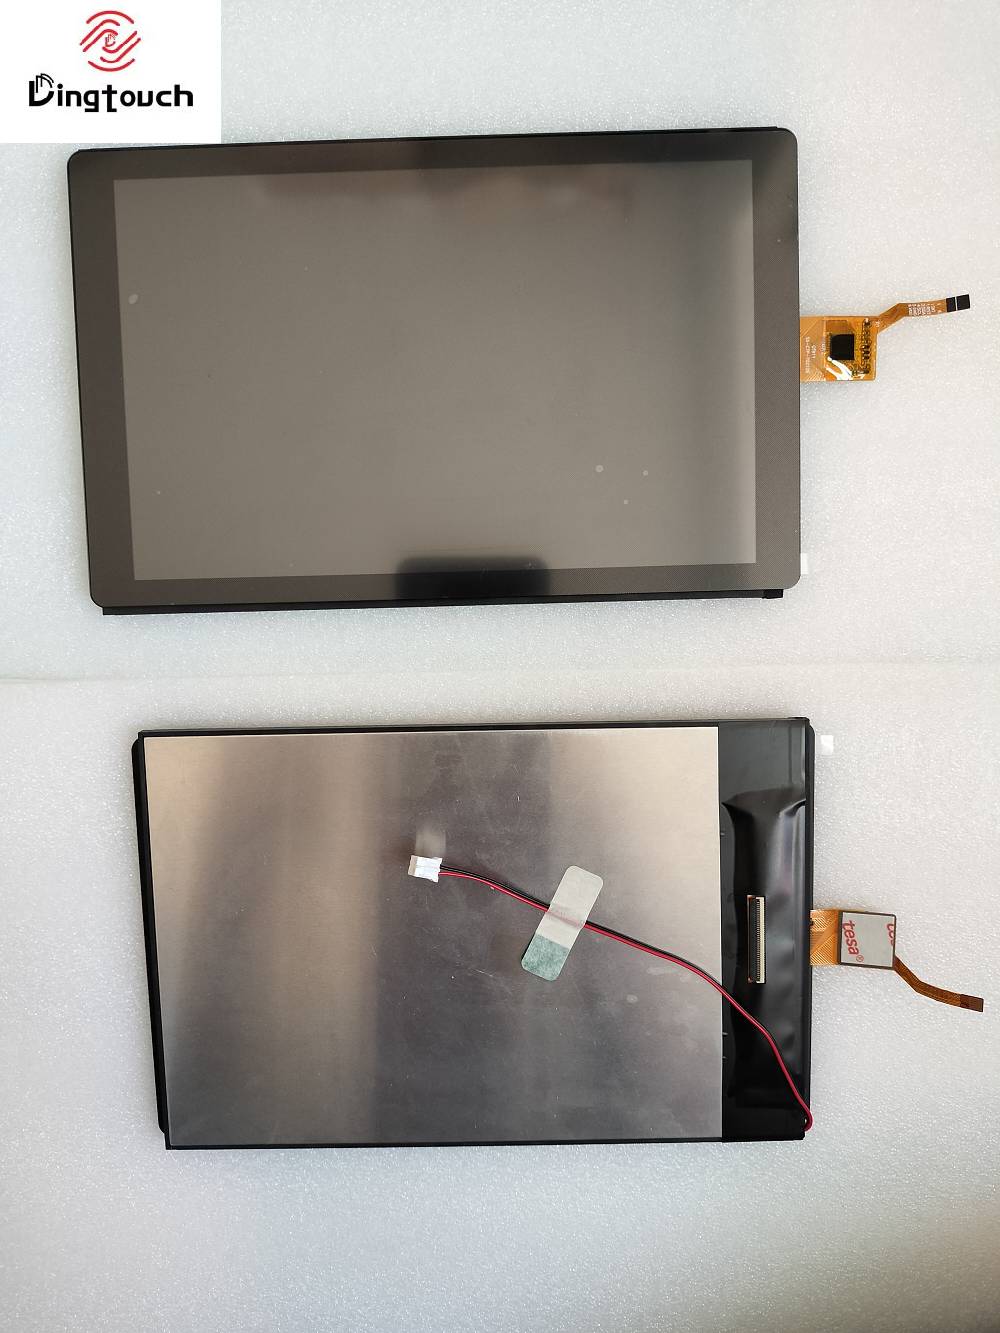
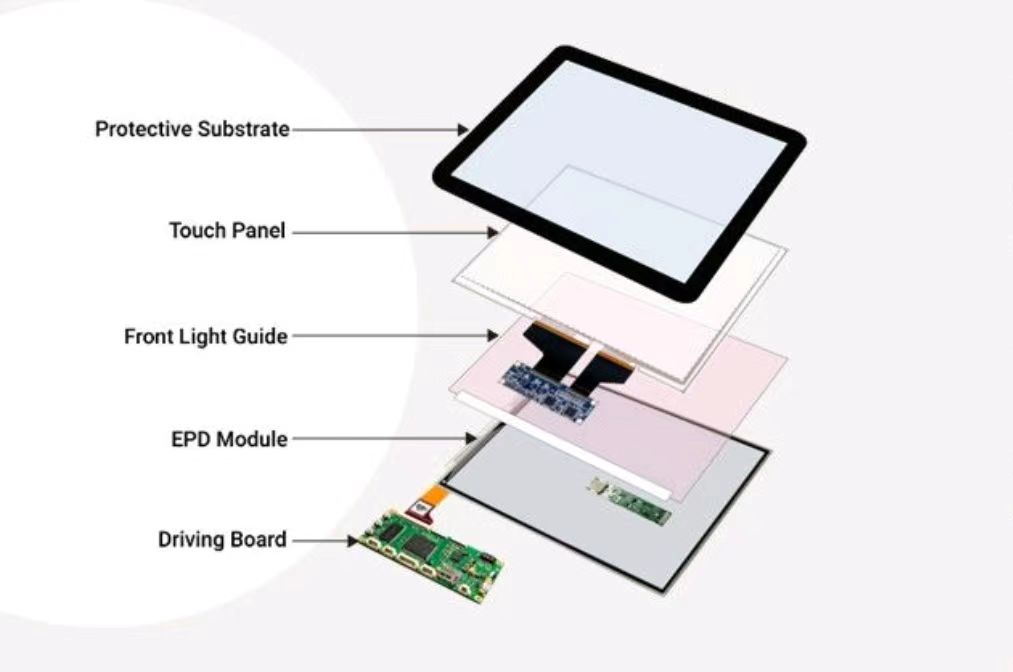
4. LCD Panel
The LCD Panel is the core display component, comprising several layers that work together to create the visible image. These layers include:
- Backlight: Provides the light source for the display. This can be CCFL (Cold Cathode Fluorescent Lamp) or LED (Light Emitting Diode).
- Polarizing Filters: Polarize the light to control its direction and intensity.
- Liquid Crystals: These are the substances that change their orientation in response to an electric field, thereby modulating the light passing through.
- Color Filters: These filters create the red, green, and blue sub-pixels that combine to form the full-color image.
- Thin Film Transistors (TFT): Control the voltage applied to each liquid crystal cell, allowing for precise control of the image.
5. Keyboard and Control Board
The Keyboard and Control Board houses the buttons and controls that allow the user to adjust settings such as brightness, contrast, and color.
- Function: The key circuit makes or breaks the connection, and when the switch is pressed, the key electronic switch is turned on. When the hand is released, the key electronic switch is turned off. The switch signal output by the key switch is sent to the MCU on the driver board. After being recognized by the MCU, the control signal is output to control the relevant circuit to complete the corresponding operation and action.
- Indicator Lights: Often included on the control board to indicate power status and other settings.

Power Distribution and Management
Voltage Regulation
Voltage regulation is crucial to ensure that each component receives a stable and consistent voltage supply. Fluctuations in voltage can lead to:
- Image Distortion: Incorrect voltages can cause inaccurate color reproduction or flickering.
- Component Damage: Overvoltage can damage sensitive electronic components.
- Malfunctions: Unstable power can cause the LCD to freeze or shut down.
Power Sequencing
Power sequencing refers to the order in which different components are powered on and off. This is important to prevent damage and ensure proper operation. For example, the backlight should typically be powered on after the driver board has initialized[4].
Standby Power
Many LCD screen include a standby mode that allows them to consume minimal power when not in use[2]. This is typically achieved using a separate standby power supply that provides a low-voltage supply to the microcontroller and other essential circuits.
Common Issues and Troubleshooting
Power Supply Problems
- Symptoms: No power, flickering screen, intermittent shut-off.
- Causes: Faulty capacitors, blown fuses, defective voltage regulators.
- Troubleshooting: Check the input voltage, examine the capacitors for bulging or leakage, test the voltage regulators with a multimeter.
Backlight Issues
- Symptoms: Dim screen, no backlight, uneven brightness.
- Causes: Faulty inverter, defective backlight lamp (CCFL or LED).
- Troubleshooting: Check the inverter output voltage, replace the backlight lamp.
Driver Board Failures
- Symptoms: No image, distorted image, incorrect colors.
- Causes: Defective scaler chip, corrupted firmware, damaged connectors.
- Troubleshooting: Check the input signal, reflash the firmware, inspect the connectors for damage.
DIY LCD Repair Guide: Tools and Techniques for Home Fixes
Essential Tools
- Screwdriver Set: For disassembling the LCD screen.
- Multimeter: For testing voltages and continuity.
- Soldering Iron: For replacing components.
- Desoldering Pump/Wick: For removing components.
- Magnifying Glass: For inspecting small components.
- ESD Strap: To prevent electrostatic discharge damage.
Repair Techniques
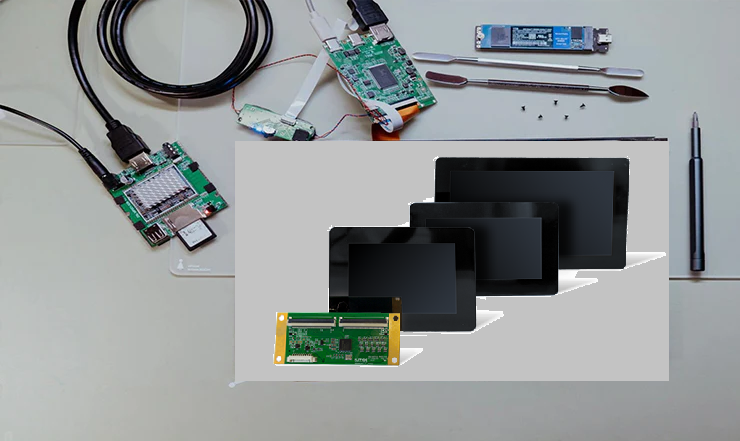
1. Disassembly: Carefully disassemble the LCD screen, taking note of the location of each component.
2. Inspection: Visually inspect the components for signs of damage, such as bulging capacitors or burned resistors.
3. Testing: Use a multimeter to test the voltages and continuity of various circuits.
4. Component Replacement: Replace any defective components using a soldering iron.
5. Reassembly: Carefully reassemble the LCD screen, ensuring that all connections are secure.
Conclusion
The components responsible for powering an LCD screen are vital to its operation. From the power supply unit that converts AC voltage to the high-voltage board that drives the backlight and the driver board managing the image display, each component plays a crucial role. Understanding these components, their functions, and common issues is essential for maintaining and repairing LCD screens. By following the troubleshooting tips and repair techniques outlined in this guide, you can effectively diagnose and fix many common LCD screen problems.
Frequently Asked Questions
1. What is the role of the power supply in an LCD screen?
The power supply converts AC voltage from the wall outlet into the various DC voltages required by the LCD screen, such as 5V, 12V, and 24V[1][4]. It ensures a stable and consistent power source for all components.
2. How does the high-voltage board (inverter) work?
The high-voltage board converts the low-voltage DC from the power supply into a high-frequency, high-voltage AC required to power the backlight of the LCD panel[1][4].
3. What are the main functions of the driver board?
The driver board receives input signals from the source, processes them, and sends the processed video signal to the LCD panel. It controls the image display and manages settings like brightness and contrast.
4. What are the common symptoms of a faulty power supply?
Common symptoms include no power, flickering screen, intermittent shut-off, and distorted image. These issues often stem from faulty capacitors or voltage regulators.
5. Can I repair an LCD screen at home?
Yes, with the right tools and knowledge, you can repair many common LCD screen problems at home. Essential tools include a screwdriver set, multimeter, soldering iron, and ESD strap.

For more details or inquiries, feel free to contact us directly at: sales@szdingtouch.com.
DINGTouch: Committed to continuous innovation and improvement of product quality to meet customers' high requirements and expectations.
DINGTouch is a manufacturer that provides high quality touch screen panels. Focus on the design, manufacturing and sales of touch screen panels, and are committed to providing customized solutions that satisfy customers.
DINGTouch: In the process of customizing touch screen panels, we focus on close cooperation and communication with customers. Understanding customers' needs and providing customized solutions will meet customers' individual needs. The company's products are favored by customers for their high quality and reliability, and provide them with the best touchscreen panel solutions.
At DINGTOUCH, we are the world's leading touchscreen manufacturer, helping businesses around the world take advantage of this exciting technology. For more information, please visit the home page now.
Find the DINGTouch technical team to achieve the success of your company's new project.
How to choose touch screen customization?

DINGTouch is a company specializing in the R&D and production of touch screen technology, headquartered in Shenzhen, China. As a professional touch screen supplier, DINGTouch is committed to providing high-quality, stable and reliable touch screen products to meet the diverse needs of customers. We continue to carry out technological innovation and product optimization to ensure that its touch screen products have good sensitivity, accuracy and durability.
In addition to the products themselves, we also focus on cooperation and communication with customers, and are committed to providing customized solutions and excellent after-sales services. Through continuous efforts to improve product quality and customer satisfaction, we have established a good reputation in the touchscreen industry and won widespread market recognition.

What DINGTOUCH can do:
• PCAP maximum size 65”
• Multi-touch (Touch screen can be customized to your needs.)
• Optical bonding service/air bonding
• LCD interface: HDMI/RGB/MIPI/LVDS/EDP, etc.
• PCAP interface: IIC/USB interface
• CTP can customize the cover glass surface treatment process AG (anti-glare), AR (anti-reflection), AF (anti-fingerprint), waterproof, and glove touch
• Supports 0.55 mm-12 mm coverslip touch.
• Support operating temperature: -40℃-90℃.

Dingtouch Industrial Capacitive Touch Screen Manufacturer
In conclusion, Dingtouch as a professional touch screen manufacturer with more than 10 years touch screen experience.We have many capacitive touch screen. Such as5 inch touch screen,7 inch touch screen,10.1inch touch screen,15 inch touch screen,15.6 inch touch screen,17 inch touch screen,18.5 inch touch screen,19 inch touch screen,21.5 inch touch screen,32 inch touch screen, However, we also welcome to customize your own touch screen . Contact our team today to learn what capacitive touch screen are best for our retail business needs.
Contact us NOW! sales@szdingtouch.com
DINGTouch: Committed to continuous innovation and improvement of product quality to meet customers' high requirements and expectations.
DINGTouch is a manufacturer that provides high quality touch screen panels. Focus on the design, manufacturing and sales of touch screen panels, and are committed to providing customized solutions that satisfy customers.
DINGTouch: In the process of customizing touch screen panels, we focus on close cooperation and communication with customers. Understanding customers' needs and providing customized solutions will meet customers' individual needs. The company's products are favored by customers for their high quality and reliability, and provide them with the best touchscreen panel solutions.
At DINGTOUCH, we are the world's leading touchscreen manufacturer, helping businesses around the world take advantage of this exciting technology. For more information, please visit the home page now.
Find the DINGTouch technical team to achieve the success of your company's new project.
How to choose touch screen customization?
DINGTouch is a company specializing in the R&D and production of touch screen technology, headquartered in Shenzhen, China. As a professional touch screen supplier, DINGTouch is committed to providing high-quality, stable and reliable touch screen products to meet the diverse needs of customers. We continue to carry out technological innovation and product optimization to ensure that its touch screen products have good sensitivity, accuracy and durability.
In addition to the products themselves, we also focus on cooperation and communication with customers, and are committed to providing customized solutions and excellent after-sales services. Through continuous efforts to improve product quality and customer satisfaction, we have established a good reputation in the touchscreen industry and won widespread market recognition.
What DINGTOUCH can do:
• PCAP maximum size 65”
• Multi-touch (Touch screen can be customized to your needs.)
• Optical bonding service/air bonding
• LCD interface: HDMI/RGB/MIPI/LVDS/EDP, etc.
• PCAP interface: IIC/USB interface
• CTP can customize the cover glass surface treatment process AG (anti-glare), AR (anti-reflection), AF (anti-fingerprint), waterproof, and glove touch
• Supports 0.55 mm-12 mm coverslip touch.
• Support operating temperature: -40℃-90℃.
Dingtouch Industrial Capacitive Touch Screen Manufacturer
In conclusion, Dingtouch as a professional touch screen manufacturer with more than 10 years touch screen experience.We have many capacitive touch screen. Such as5 inch touch screen,7 inch touch screen,10.1inch touch screen,15 inch touch screen,15.6 inch touch screen,17 inch touch screen,18.5 inch touch screen,19 inch touch screen,21.5 inch touch screen,32 inch touch screen, However, we also welcome to customize your own touch screen . Contact our team today to learn what capacitive touch screen are best for our retail business needs.
Contact us NOW! sales@szdingtouch.com
CATEGORIES
CONTACT US
Contact: Dingtouch
Phone: +8615815536116
Tel: +8615815536116
Email: sales@szdingtouch.com
Add: Building A, Bailu Plaza, No. 48, Gonghe Industrial Road, Gongle Community, Xixiang Street, Baoan District, Shenzhen,China. 518126
 Dingtouch